
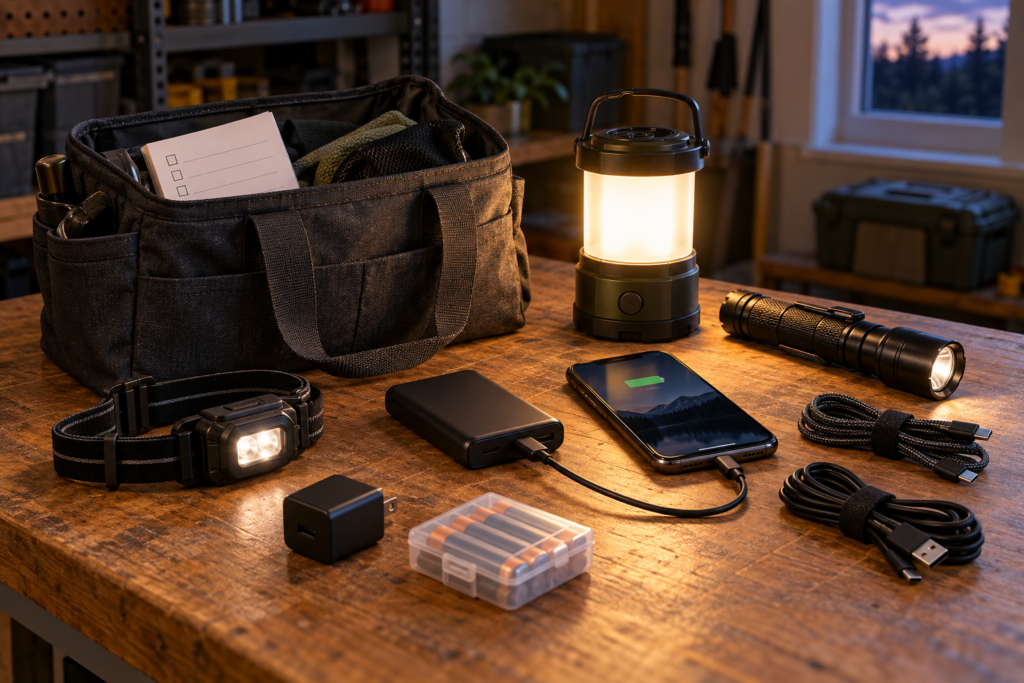
An outage-ready charging kit with dependable lighting saves you from digging through drawers when the power goes out. A power outage gets inconvenient fast when your phone is at 12 percent, the good flashlight has wandered off, and every charging cable in the house has apparently joined a witness-protection program. An outage-ready charging and lighting kit puts the useful stuff in one place: enough backup power for your essential devices, safe portable lighting, and the right cables to make it all work.
This practical weekend project works for apartments, houses, campers, workshops, and anyone who wants a better plan than digging through kitchen drawers in the dark. It is not a replacement for a generator, whole-home backup system, or specialized medical-power planning. The goal is simpler: keep communication, basic lighting, and a few small essentials available when the grid takes a break.
Quick Overview
This guide walks you through building a compact outage-ready charging and lighting kit around the devices you already use. You’ll choose a power bank or portable power pack based on your actual power needs, gather dependable lights, match cables and chargers, and store everything where you can find it without a scavenger hunt.
The setup is especially useful if outages in your area are occasional, you travel frequently, or you want a simple emergency kit without buying a pile of expensive gear. FEMA’s emergency-supply guidance includes a flashlight with extra batteries and an extra cell-phone battery or charger, making this a sensible baseline rather than a gadget-collector exercise. FEMA’s emergency supply checklist also notes that households should tailor supplies to their individual needs.
What You’ll Need
- A charged power bank or portable power pack
- A rechargeable flashlight, lantern, headlamp, or a combination that fits your space
- Extra batteries for any light that does not use an internal rechargeable battery
- Charging cables for the devices you expect to use
- The manufacturer-supplied or approved charger for your battery gear
- A wall charger or charging block that works with your chosen cables
- A small tote, pouch, drawer organizer, or clearly labeled storage bin
- A printed device-and-cable checklist
- A marker and labels, if several people share the kit
- Your device manuals or manufacturer instructions, especially for larger portable power packs
Before You Begin
Start by deciding what this kit needs to keep running. For most households, that means one or two phones, a flashlight or lantern, perhaps a headlamp, and possibly a small radio or another low-power device. It does not automatically mean laptops, televisions, coffee makers, space heaters, or every rechargeable thing you own. Those larger loads can quickly turn a modest kit into an expensive, bulky setup.
Check your devices and cables before buying anything. Identify which phones use USB-C, Lightning, Micro-USB, or another connector. Look at the charging inputs for your lanterns and headlamps, too. A kit with plenty of power but the wrong cable is still just a fancy paperweight.
For lithium-ion power banks and rechargeable lights, read the manufacturer’s instructions before charging or storing them. Look for equipment bearing an appropriate safety-testing mark from a nationally recognized testing laboratory, and check for recalls before relying on a new purchase. If you are considering a larger portable power pack with AC outlets, verify its stated watt-hour capacity, available ports, maximum output, and approved charging equipment. UL’s portable power pack guidance is a useful reminder that these products are not all designed for the same job.
Step-by-Step Instructions
Step 1: Define the jobs your kit must handle
Write down the devices you actually need during a typical outage. Keep the list short and practical. A phone for calls, weather information, and family communication belongs on the list. A headlamp for hands-free work and a lantern for a room often do, too.
Think about where an outage changes your routine. In an apartment, you may mainly need phone power and light. In a house with a basement, garage, or long driveway, a headlamp and stronger flashlight may matter more. If you work from home, you may decide that keeping one phone and a small hotspot charged is more valuable than trying to power a full laptop setup.
This step prevents the classic gear-buying mistake: purchasing the biggest box you can afford before figuring out what problem it solves.
Step 2: Estimate how much backup energy you need
Battery capacity is commonly expressed in watt-hours, while watts describe how much power a device uses at a given moment. A simple planning estimate is:
Device watts × hours of use = watt-hours needed
For a steady load, a 5-watt light used for four hours needs about 20 watt-hours before losses. Phone charging is less straightforward: the wattage printed on the charger is its maximum output, not a constant draw. For phones, plan around the number of recharges you need, check the manufacturer’s estimates for your device, and test your actual combination before relying on it.
List each device, estimate how long you expect to use it, and add those energy needs together. Leave some margin rather than planning around a perfect calculation. Charging losses, battery age, and real-world conditions will affect how much usable energy you get.
The U.S. Department of Energy explains the distinction between watts and watt-hours, and that distinction matters when comparing backup-power options. Do not shop by vague promises such as “charges your phone several times” alone. Results vary with the phone, battery condition, cable, and how the equipment is used.
A small USB power bank may be enough if your only goal is phone charging. A larger portable power pack can make sense if you need more ports, longer runtime, or the ability to run compatible low-power equipment. Bigger is not automatically better, though. Larger packs cost more, take up more storage space, and require more attention to keep charged.
Step 3: Choose lighting for the way you’ll use it
A good outage kit usually benefits from more than one type of light. A headlamp keeps both hands free while you navigate stairs, find supplies, handle simple household tasks, or locate the dog that has decided this is all very suspicious. A lantern works better for lighting a table, bathroom, bedroom, or shared room.
A flashlight is still worth having for focused light and quick checks outdoors or in tight spaces. Choose the format you will realistically use, not the one that looks most tactical in a product photo. A simple light with an obvious power button and a charging method you understand is more useful than a complicated model with seven modes you can’t remember under normal conditions.
Rechargeable lights reduce the need to keep several battery types on hand. Lights with replaceable batteries can still be useful as backups, especially if you already use that battery size elsewhere. If you choose them, store unused spare batteries alongside the light rather than assuming they will be somewhere nearby when needed.
Step 4: Match every device with the correct cable and charger
Lay out every device on your list, then assign the cable and charger it needs. Label cables if your household has similar-looking cords with different ends. A strip of tape and a marker may not look glamorous, but neither does trying to identify a cable by touch at 2 a.m.
Include only cables that serve your planned devices. A drawer full of mystery cords is not preparedness; it is archaeology. Keep one cable for each important device whenever possible, plus a backup cable for the phone connector used most often in your household.
Use the charger supplied by the manufacturer or one the manufacturer approves for the power bank or portable power pack. Do not assume that every random charging block and cable is interchangeable, particularly with higher-capacity battery equipment. Check the instructions for compatible ports, proper charging methods, and limits on what the pack can power.
Step 5: Organize Your Outage-Ready Charging Kit
Choose a container that fits your home and equipment. A small handled tote works well on a closet shelf. A zippered pouch may be enough for an apartment or travel setup. A larger bin can make sense if the kit includes batteries, several lights, and a more substantial portable power pack.
Place the most urgent items at the top: a flashlight or headlamp, charged phone power bank, primary cable, and printed checklist. Put spare batteries in a separate small bag or case so they do not roll around with loose cables and accessories.
Store the kit somewhere dry, accessible, away from direct sunlight and heat sources, and known to everyone who may need it. Avoid burying it behind holiday decorations, paint cans, or the one box nobody has opened since moving day. A kit you cannot reach during an outage is mostly a storage-decoration choice.
Step 6: Add a printed checklist and simple instructions
Make a one-page checklist that names every item and shows what it supports. Keep it plain. For example:
- Power bank: phones and USB lights
- USB-C cable: primary phone
- Lightning cable: household backup phone
- Headlamp: hands-free lighting
- Lantern: room lighting
- Spare batteries: flashlight backup
- Wall charger: recharge kit after outage
Include the location of any manuals and a note about which charger belongs to each battery product. This is especially helpful if a family member, roommate, guest, or neighbor needs to use the kit without you there to explain the system.
Step 7: Charge, test, and reset the kit
Take rechargeable equipment out of the storage pouch or bin before charging. Charge it on a hard surface away from combustible materials, keep ventilation openings clear, and avoid charging while you sleep.
Charge the power bank, portable power pack, and rechargeable lights according to their instructions. Then test them. Turn on each light, connect each cable, and confirm that the power bank begins charging the intended device.
Check that the lantern is bright enough for the room where you expect to use it. Make sure the headlamp fits comfortably and can be operated without a mirror or a degree in button interpretation. If the kit includes replaceable batteries, verify that they are the correct type and store them in their original packaging or a suitable battery case.
After testing, return everything to the container and place the checklist on top. Set a recurring reminder to inspect and recharge the kit periodically, following each manufacturer’s storage guidance.
Helpful Tips
- Keep the primary kit near an exit, kitchen, or central closet rather than in a detached garage.
- Consider a smaller second kit for a work bag or bedroom. If you carry rechargeable gear in a vehicle, follow its temperature limits and bring it indoors rather than leaving it in a parked car during extreme heat or cold.
- A headlamp is often more useful than a second flashlight because it frees both hands for cooking, repairs, pet care, or navigating stairs.
- Choose a lantern with simple controls. In an outage, “easy to use” beats “has twenty-seven lighting modes.”
- Keep cables loosely coiled and secured with reusable straps to reduce strain at the connectors.
- If a power bank is rarely used, inspect it before relying on it. Swelling, physical damage, unusual heat, or a damaged cable are reasons to stop using the equipment and follow the manufacturer’s guidance.
- Keep your kit focused. A compact kit that gets checked and maintained is better than a giant bin of neglected gear.
Common Mistakes to Avoid
- Buying capacity without checking output. A battery may store plenty of energy but still lack the ports or output needed for your device.
- Relying on one cable. Cables wear out, disappear, and fail at deeply inconvenient times.
- Using an untested light. Charge and operate every rechargeable light before placing it in the kit.
- Mixing loose batteries with metal items. Store spare batteries separately in suitable packaging or a battery case.
- Assuming a power bank can run any appliance. Match the pack’s output and instructions to the device you intend to use.
- Storing the kit out of sight and out of mind. Batteries and rechargeable gear need periodic checks.
- Overbuilding the setup. If basic phone charging and lighting are your real needs, a massive power station may add cost and maintenance without much practical value.
Final Thoughts
An outage-ready charging and lighting kit does not need to be impressive. It needs to be charged, organized, safe to use, and built around the devices that matter in your everyday life.
Start with communication and light, then expand only when you have a clear need. The best setup is one you can find quickly, understand easily, and keep ready without turning preparedness into another full-time hobby.
Frequently Asked Questions
Do I need a portable power station for outage preparedness?
Not necessarily. A basic USB power bank and reliable rechargeable lights may cover your needs if you mainly want phone charging and room lighting. A larger portable power pack makes more sense when you need additional ports, greater stored energy, or the ability to run compatible low-power equipment.
How often should I check my charging and lighting kit?
Follow each manufacturer’s storage and recharge instructions, and inspect the kit periodically. During each check, confirm that the lights work, cables are intact, spare batteries are usable, and the power bank still charges your intended devices.
Should I choose rechargeable lights or battery-powered lights?
Rechargeable lights are convenient when you can keep them charged and have suitable charging power available. Lights with replaceable batteries can be useful backups, particularly when you already keep the required battery type on hand. A mix of both can be practical.
Can I use any USB charger with my power bank or portable power pack?
Do not assume so. Use the manufacturer-supplied charger or an approved alternative, especially for larger battery equipment. Check the product instructions for compatible charging methods, ports, and cable requirements.