

A small garage attic access hatch can turn perfectly good overhead space into a place you avoid using. The fix is not simply making the hole bigger and tossing plywood over the joists. Safe garage attic storage starts with confirming that the framing can support it, then creating an access route that lets one person climb, see, stand, and move bins without balancing over drywall.
This guide will help you plan safer, easier garage attic access, whether that means a professionally reframed opening and pull-down stair, a modest storage platform, or a lift for bins. Some planning and preparation are homeowner-friendly. Changing structural framing, modifying trusses, installing a pull-down stair, and preserving the garage’s required separation are jobs for a qualified contractor unless you have the approved design, permits, and experience to do them correctly.
Quick Overview
A usable garage attic needs more than empty volume. You’ll learn how to assess the space, choose safer access, create a properly supported storage area, add lighting and handholds, and move lightweight containers without carrying them while climbing.
This guide is for homeowners who have a small ceiling access hole and want limited, organized attic storage. It is not a green light to store heavy tools, furniture, engines, boxes of tile, or anything else that turns the attic into a secret warehouse. Before adding decking, storage lifts, or concentrated loads, have the existing ceiling framing and load path evaluated.
What You’ll Need
- Tape measure
- Flashlight or headlamp and a temporary work light
- Gloves, eye protection, and a dust mask or respirator appropriate for dusty insulation
- Camera or phone for photos and measurements
- Notebook or planning app
- Manufacturer instructions for any attic ladder, stair, handrail, or storage-lift system you are considering
- Lightweight, stackable storage containers with secure lids
- Labels
- Contact information for a qualified contractor, structural professional, or building official when framing, trusses, permits, or garage separation are involved
Before You Begin
Start by treating the attic as an unknown structure, not a blank storage room. Ceiling joists may have been designed only to support the ceiling below and provide limited attic access—not storage. The 2021 International Residential Code distinguishes among attics without storage, limited-storage attics, and attics served by fixed stairs because their expected loads differ. That is a useful reminder that available space does not automatically equal available capacity. Review the applicable IRC roof and ceiling provisions and confirm what your local jurisdiction has adopted.
Use the existing hatch to inspect only what you can see safely. Look for roof trusses versus conventional rafters and ceiling joists, along with water staining, wet insulation, mold, rot, damaged wiring, disconnected exhaust ducts, or signs of pests. Stop and call a professional if access is too tight for a safe inspection or if you find any of those conditions. Never walk on ceiling drywall or insulation. If you must enter for an evaluation, stay only on framing confirmed safe for access or on an existing supported platform.
Also determine whether the garage ceiling forms part of the required separation between the garage and the house and, if so, how that protection must be maintained. Openings, penetrations, drywall, access panels, and ladder assemblies may need to meet local code requirements. An attic upgrade should not leave you with a convenient ladder and a compromised garage ceiling. Convenience is nice; not giving fumes and fire an easier route into the house is nicer.
Step-by-Step Instructions
Step 1: Measure the current opening and the full travel path
Measure the existing access opening, floor-to-ceiling height, and open floor area below the hatch. Then measure the attic side: clear space above the opening, available headroom as you climb through, and the distance to the first area where you could safely stand or store anything.
If you are considering a pull-down attic stair or ladder, measure the required swing and landing clearance exactly as the manufacturer directs. These dimensions vary by model. A manufacturer may specify a compatible ceiling-height range, swing clearance, and landing space, but those numbers apply only to that unit—not every attic ladder ever made. Check the manual before buying anything.
Look for conflicts below and above the opening, including garage-door tracks, open vehicle doors, shelving, electrical wiring, ductwork, roof braces, and low roof framing. A ladder that lands where you park your truck is not a plan. It is a future argument with your bumper.
Step 2: Determine whether the attic can safely support storage
Ask a structural professional or other qualified building professional to evaluate the framing before you install decking, build a platform, or hang a storage lift. The evaluation should account for the joists or truss bottom chords, spans, connections, bearing points, and the load path to the structure below.
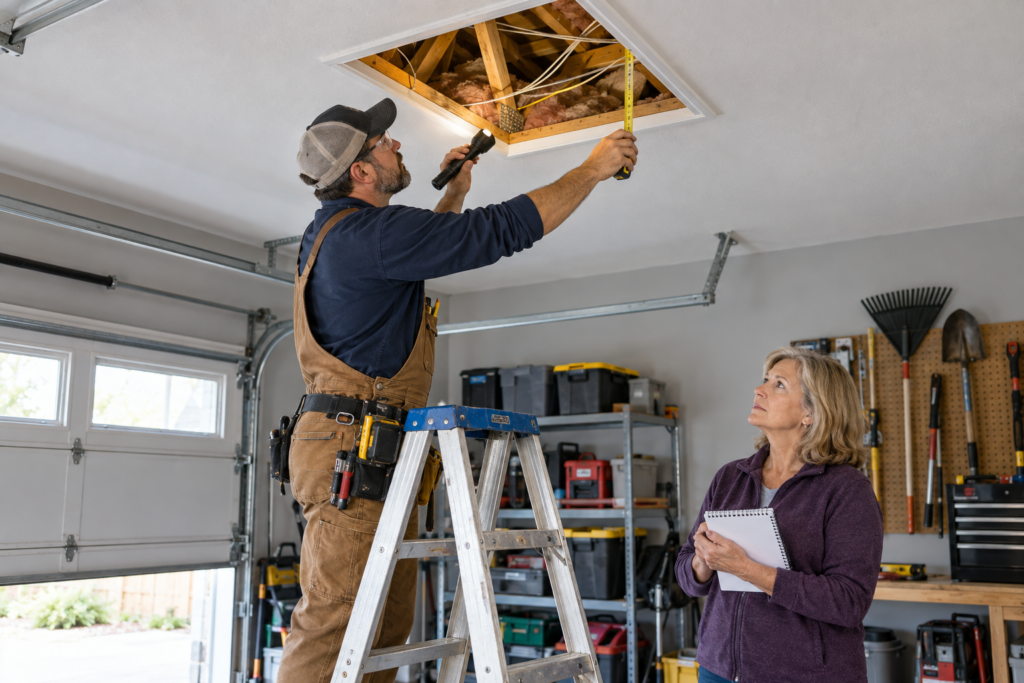
This matters even if the attic looks sturdy. A few lightweight boxes spread across an evaluated limited-storage platform are different from a row of dense bins, a workbench, or a heavy lift carrying seasonal gear. Heavy items can also create concentrated loads, which may be more demanding than the same weight spread over a larger area.
Do not assume you can strengthen the attic by screwing plywood to whatever framing is there. Plywood adds weight, and incorrectly installed reinforcement can cause problems rather than solve them. The professional may recommend limited storage, a platform in a specific location, additional support, or no storage at all. Each is a useful answer.
Step 3: Choose the safest access upgrade
For many garages, a properly selected pull-down attic stair or ladder is a practical upgrade from a small hatch. Choose a unit designed for your ceiling height, rough opening, and available floor clearance. A model with a handrail can make a major difference when you are climbing alone, especially during the transition through the opening.
A fixed stair can be easier to use, but it usually requires much more space, framing work, and code review. It may also change the expected loading category for the attic. That is firmly contractor territory.
If enlarging the opening is necessary, do not start cutting framing based on a ladder-box diagram or an internet video. Manufacturer instructions may require headers and support for cut ceiling joists, and those details must suit your home’s actual framing. More importantly, never cut, drill, notch, or otherwise alter roof trusses without project-specific professional direction. The Structural Building Components Association notes that truss modifications must be individually analyzed with professional assistance.
Step 4: Have the Opening Properly Reframed and Preserve Required Separation
This is where a qualified contractor earns their keep. If ceiling joists must be cut, headers and trimmers may be needed to transfer loads around the new opening. The contractor should follow the approved design, the ladder manufacturer’s requirements, and local permitting rules.
The finished opening also needs to preserve the required separation between the garage and house. Depending on your local code and the home’s layout, that may affect the hatch cover, drywall details, fasteners, penetrations, and ladder assembly. Do not remove garage-ceiling drywall and assume a thin sheet of plywood will provide equivalent protection.
Before the contractor leaves, test the access unit several times. Confirm that it opens fully, locks or latches as designed, rests securely on the garage floor, and does not interfere with lights, door tracks, vehicles, or stored equipment.
Step 5: Build only the storage platform the framing supports
Once the attic’s storage capacity has been evaluated, create a defined platform rather than treating the entire attic as usable floor. The platform should be supported according to the approved plan, with a stable walkway from the opening to the storage area.
Do not use loose boards balanced across joists as a permanent solution. They can shift, catch your feet, and encourage you to wander into areas never intended for traffic. A well-planned platform clearly shows you where to walk—and where not to.
Keep the storage area modest and organized. Leave enough room to turn around safely near the opening, and maintain clear access to wiring, junction boxes, ducts, and other components that may need inspection or service. Do not block soffit ventilation or pack insulation where it interferes with airflow.
Step 6: Add lighting, handholds, and a safe transition point
Good lighting is not optional in a low, dusty attic full of framing surprises. Install permanent lighting using proper electrical methods and fixtures suitable for the space. A qualified electrician should handle new wiring if you do not have the training and experience to do it safely.
At minimum, use a dependable work light and headlamp for occasional trips. Position the light so it illuminates the ladder opening, platform, and first few feet of the route—not just a bright spot in the far corner.
Add stable handholds where you need them most: at the top of the ladder and where you step onto the platform. Handholds must be attached to framing or another approved structural support, not drywall, thin sheathing, or a convenient-looking roof brace. The goal is a controlled three-point transition, not a dramatic pull-up through the hatch.
Step 7: Use small, lightweight containers and label them well
Choose smaller bins you can comfortably control from the platform. Clear or consistently colored containers help, but labels matter more. Label the side facing the walkway, not just the lid, so you do not need to move three bins to find the holiday lights.
Keep frequently used bins near the opening. Place lighter, rarely used items farther away, but only within the boundaries of the approved platform. Avoid storing liquids, paint, chemicals, batteries, or temperature-sensitive items unless their labels specifically permit attic conditions. Garages and attics experience significant temperature swings, so this is not the place for every leftover mystery can in the house.
Set a personal weight limit for bins that allows you to move them without straining or losing your balance. If a container feels awkward on the ground, it will not become graceful halfway up an attic ladder.
Step 8: Raise and lower bins without carrying them on the ladder
Do not climb while holding a tote, box, or tool bag. Keep both hands available for the ladder and handrails. Instead, place the container in a clear lifting area, climb empty-handed, and use a controlled lifting method from a stable position.
For very light containers, a rope-and-pulley system can work if it is attached to framing verified to support the load. The system should keep the bin secure and controlled throughout its travel. Use a closed, dependable attachment point on the container, keep the lifting zone clear, and never stand beneath a suspended load. A casual clothesline-style setup is not suitable for heavy bins.
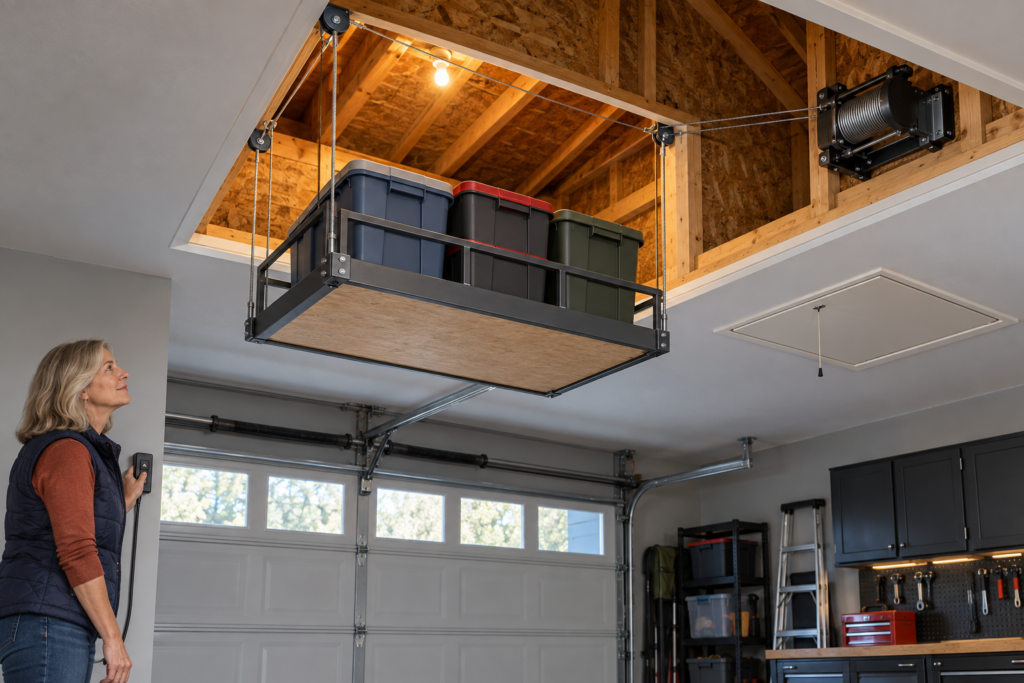
An attic storage lift may be a better option for repeated use, but it requires careful selection and installation. The lift, mounting structure, rated capacity, and loaded weight all matter. Have a qualified installer or structural professional confirm that the framing can support the equipment and its load. Raise or lower containers onto a clear landing area, then use the ladder separately.
Helpful Tips
- Keep a flashlight near the attic access even after permanent lighting is installed.
- Mark the approved walkway and platform boundaries so nobody steps onto unsupported drywall or insulation.
- Use one container size when possible. It stacks more neatly and makes weight limits easier to manage.
- Keep a short inventory near the hatch or on your phone to reduce unnecessary attic trips.
- Open and inspect the ladder before each use. Look for loose hardware, damaged feet, cracked steps, or a latch that does not engage.
- Schedule attic work for a mild day when possible. Garage attics can get brutally hot, and heat makes every awkward move worse.
Common Mistakes to Avoid
- Assuming an empty attic is built for storage. Have the framing and load path evaluated before adding platforms, bins, or lifting equipment.
- Cutting trusses to enlarge the opening. Trusses are engineered components. Altering one without a project-specific professional design can create serious structural problems.
- Walking on drywall or insulation. Stay on an approved platform or framing that has been evaluated for safe access.
- Buying a ladder before measuring clearance. Check ceiling height, opening size, swing space, landing room, and attic headroom first.
- Carrying bins while climbing. Use a controlled lifting method or raise containers after you are safely positioned.
- Storing heavy or heat-sensitive items overhead. Keep attic storage light, stable, and appropriate for the conditions.
- Ignoring garage separation requirements. Any new opening, hatch, or ladder installation must maintain applicable code requirements.
Final Thoughts
The best garage attic storage setup is not the one that holds the most stuff. It is the one you can use without guessing where to step, wrestling bins up a ladder, or wondering whether the ceiling is quietly protesting beneath you.
Start with a structural evaluation, make the access route safe, and keep storage light and deliberate. A smaller, well-supported platform with good lighting beats a giant attic full of regret every time.
Frequently Asked Questions
Can I store boxes in my garage attic if it already has ceiling joists?
Not necessarily. Ceiling joists may be intended primarily to support the ceiling below, not storage loads. Have the framing and load path evaluated before adding decking, bins, or a storage lift.
Can I enlarge a garage attic access hole myself?
Possibly, but only after determining what framing, wiring, and code-required separation the opening affects. If the opening must be reframed, a truss would be altered, or the garage separation must be reconstructed, hire a qualified contractor and obtain any required approval or permit.
Is a pull-down attic ladder safer than using a portable ladder?
A properly selected and installed pull-down ladder can provide more stable, consistent access, especially when it includes a handrail and matches the ceiling height and clearance requirements. It still must be inspected and used according to the manufacturer’s instructions.
Can I use a pulley to lift storage bins into the attic?
Yes, for appropriately light loads and only when the attachment point and supporting framing have been verified. Secure the bin, keep people out of the load path, and never climb while carrying or suspending the load.