
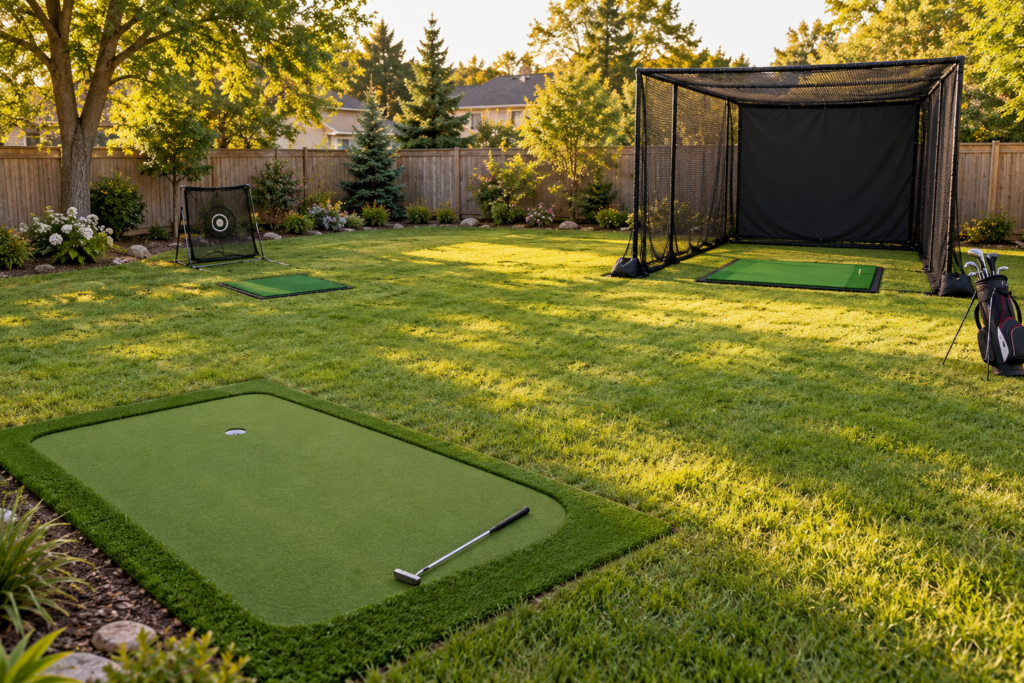
A home golf practice area can be as simple as a putting mat or as involved as a properly equipped hitting bay. The useful setup is the one that fits your available space and the skills you want to practice—not the one that crams every golf gadget into the garage.
Start by deciding which activities your space can safely support. Putting needs a clear rolling surface. Chipping needs room for the club, ball flight, and missed shots. Full swings require substantially more clearance and suitable containment. If you plan to include a full-swing station, assess that first, then arrange the other practice zones outside its hitting and access areas.
Quick Overview
This guide shows you how to divide one home golf area into distinct putting, chipping, and swing zones. You will learn how to choose the safest layout, establish ball-flight boundaries, place targets, and make each space useful without building a full golf-course-style practice facility.
This approach can work in a backyard, garage, outbuilding, or suitable indoor room, but you do not need all three zones. Start with putting and add other activities only where clearance and ball containment allow. A simulator still involves swinging a club and usually striking a real ball; it does not solve a space or safety problem.
What You’ll Need
- A tape measure or measuring wheel
- Your longest club, usually a driver, for clearance testing
- A golf-specific hitting mat if you will hit full shots in a restricted space
- A golf-rated net, impact screen, or other purpose-built containment system
- Golf balls, foam balls, or limited-flight practice balls suited to the area
- A putting mat, synthetic putting turf, or maintained natural-grass putting surface
- Cups, putting targets, or movable markers
- Chipping targets, such as a landing mat, practice flag, bucket, or designated hole
- Cones, paint-safe markers, stakes, or other visual boundary markers
- A rake, broom, or leaf blower for keeping an outdoor practice surface clear
- Outdoor-rated power access and lighting if you plan to use launch-monitor or simulator equipment
Before You Begin
Walk the area with safety in mind before moving a single mat or cup. Identify the direction a struck ball would travel from the proposed full-swing station. That line should face away from the house, doors, windows, seating areas, walkways, vehicles, neighboring property, and the putting and chipping zones.
Before rehearsing a swing, measure the available height, width, and depth and compare them with the instructions for your intended equipment. Only then check the proposed hitting position with slow, controlled no-ball movements, including the backswing and follow-through. SkyTrak’s space-planning guidance emphasizes that clearance depends on the golfer, swing, and equipment. A slow rehearsal is one check, not proof that a cramped space is safe for full-speed swings. If you hesitate or alter your movement to miss an obstacle, choose another location or leave out the swing zone.
For outdoor installations, check the ground after rain. A pretty putting surface that stays soggy is just a green-colored puddle with ambitions. Natural-grass greens can require drainage, irrigation, specialized rootzone materials, and ongoing turf care, according to the USGA’s guidance for backyard greens. Synthetic surfaces also need a stable, properly prepared base and a shape that sheds water.
If you will excavate for drainage, a base, anchors, or lighting, contact 811 before digging. Required waiting periods vary by state. For outdoor electronics, use weather-protected, GFCI-protected power, keep equipment away from overhead lines, and hire a qualified electrician when new outdoor wiring or receptacles are needed.
Step-by-Step Instructions
Step 1: Map the available space and its fixed obstacles
Measure the overall area, then mark permanent obstacles that affect practice: walls, fences, trees, doors, utility equipment, patios, windows, overhead beams, and power lines. Do not measure only the open patch of grass or bare floor. Account for the room needed to walk, retrieve balls, carry clubs, and step safely out of the hitting area.
Sketch the space on paper, or use painter’s tape, cones, or stakes to create a rough full-scale layout. Mark where people naturally enter and exit. Those pathways matter. A good golf zone should not require someone to cross in front of a hitting station to reach the grill, shed, back door, or laundry room.
Step 2: Place the full-swing zone first
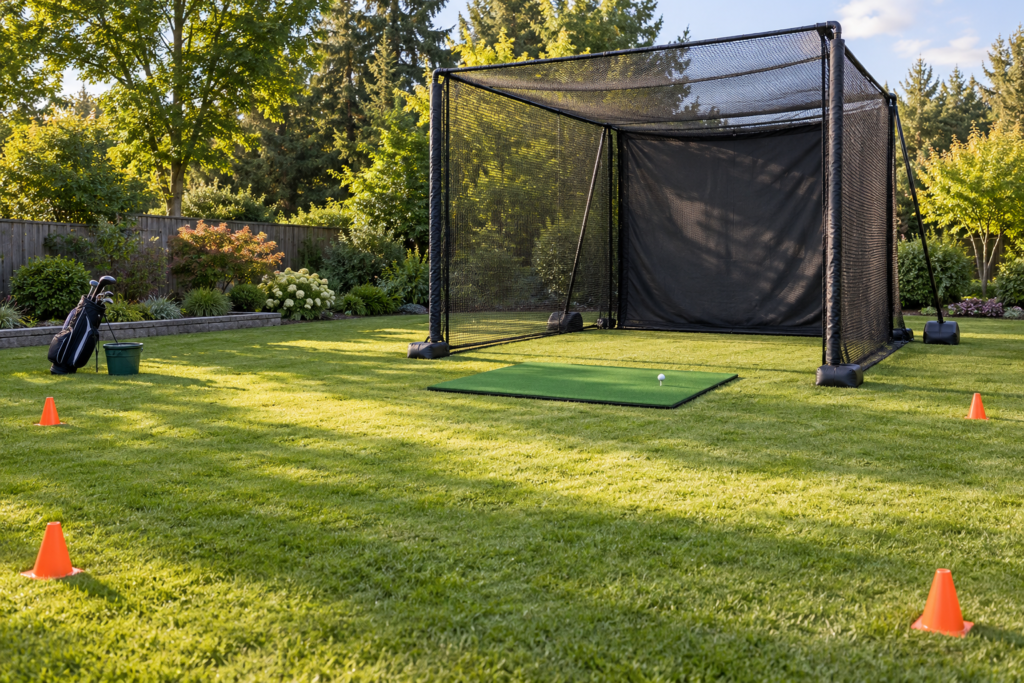
Put the swing zone at one end of the area, with the target, net, or impact screen directly in front of the hitting position. This is the anchor of the entire layout because it has the strictest safety and clearance needs.
The target line should run away from people and property you need to protect. Avoid aiming toward the house simply because it makes the layout look symmetrical. Symmetry is nice. A golf ball through a window is less nice.
Use a golf-specific hitting mat and containment system when ball flight is restricted. Follow the exact setup instructions for your net or screen, including any guidance for anchoring or weighting it outdoors. Before each session, inspect the netting for wear, check the frame connections, and consider the wind. A portable net that shifts, tips, or develops a weak spot is not a safety plan.
Step 3: Establish a clear no-entry area around the swing bay
Create a visible exclusion area around the full-swing station. Cones, contrasting turf, boundary tape, or a simple change in surface can make the boundary obvious. The goal is simple: nobody should be unsure where they can stand while someone is swinging or hitting.
Keep ball baskets, club storage, chairs, and drink coolers outside this zone. That may sound fussy, but clutter pulls people into the wrong place. It also creates tripping hazards when you are trying to focus on a swing.
If multiple people use the area, allow only one person to strike balls at a time. Everyone else must remain in a designated waiting area outside the club’s entire swing arc and possible ball or rebound paths. Being behind the hitter is not enough if someone is still within reach of the backswing. Stop all hitting before anyone retrieves balls or crosses between zones.
Step 4: Put the putting zone where it can stay clean and accessible
Choose the flattest, most visible area outside the full-swing firing line. A putting surface works best where you can use it often, so avoid placing it behind the net, in a narrow passageway, or somewhere it will become a storage shelf for rakes and lawn furniture.
For a compact setup, a putting mat with several movable targets can provide plenty of useful practice. If you are installing synthetic turf or building a larger outdoor green, plan the base and drainage before choosing contours or cup locations. Slight slopes can make practice more interesting, but extreme breaks often become novelty putts rather than useful, repeatable training.
Natural grass can look and play great, but it is not simply a patch of lawn cut short. The USGA notes that backyard greens often need specialized construction and maintenance. If you want a complex green with several targets, drainage work, or surrounding short-game features, professional design help may be worthwhile.
Step 5: Build the chipping zone as a controlled transition area
Place the chipping zone between the putting area and the outer edge of your practice space, or along one side of the putting surface. It should allow balls to finish at a designated target or on the putting green without crossing the swing bay or a walking route.
Allow for mishits, not just the chip you intend to play. A low shot can travel beyond the landing target, and a lofted shot can rise higher than expected. Use suitable golf containment where needed, and never chip toward a green while someone is putting on it. Shared targets should be used one activity at a time.
Think in terms of separate ball-flight paths, not just separate surfaces. A chipping station can share a target with the putting green, but it should not send shots through the full-swing target line. If those paths overlap, move the chipping station, rotate the green, or use a separate target.
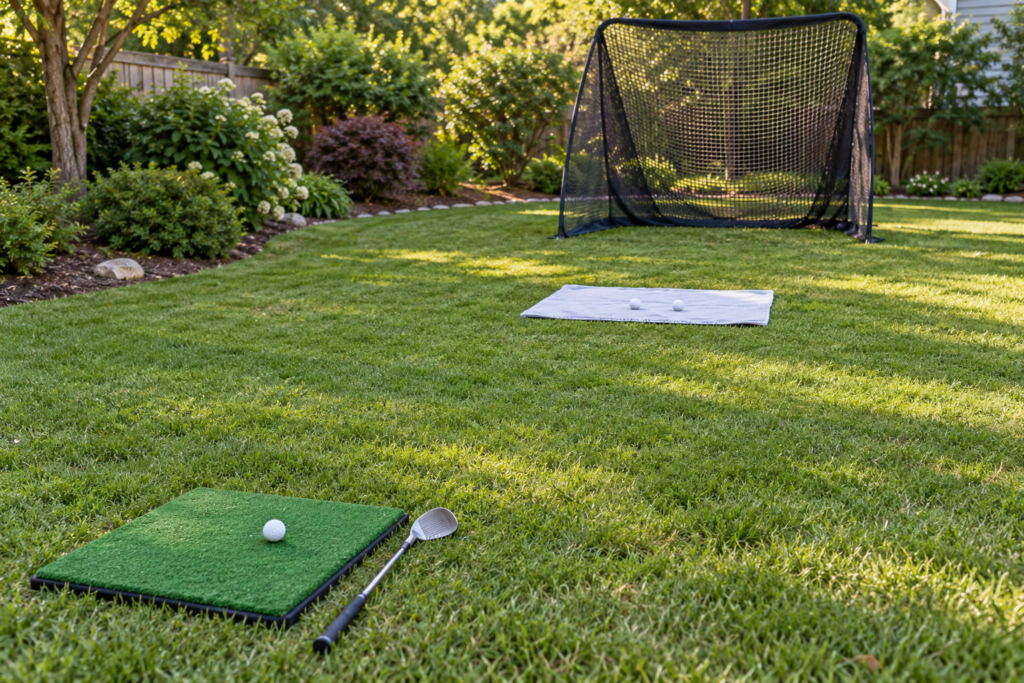
For a simple setup, mark one or two chipping positions and one landing area. A small landing mat, towel, or patch of different turf can help you practice controlling carry distance rather than simply tossing balls toward a cup and hoping the golf gods are feeling generous.
Step 6: Choose balls and targets that match the space
Use real golf balls only where your containment and available space are genuinely suited to them. In tighter or shared spaces, foam or limited-flight balls may make more sense for some chipping drills. They are not perfect substitutes for a real ball, but they are far better than pretending a garage door is an impact screen.
Give every zone a distinct target:
- The swing zone needs a net, screen, or defined full-shot target.
- The chipping zone needs a landing target, flag, cup, or marked landing area.
- The putting zone needs cups, gates, alignment marks, or distance targets.
Clear targets prevent the zones from blending into one vague practice patch where every shot becomes the same shot.
Step 7: Create simple traffic and storage rules
Set up storage behind or beside the practice area, never in front of the swing station. Keep balls, clubs, tees, alignment sticks, and cleaning tools in one predictable place. A small weatherproof bin outdoors can keep the area from looking like a yard sale with wedges.
Plan how you will collect balls, too. Position the net and chipping targets so balls gather in a manageable area rather than rolling under a deck, into landscaping, or toward a neighbor’s fence. Fewer scavenger hunts mean more actual practice.
Step 8: Test each zone separately, then test the full flow
Before using the area at full speed, test putting, chipping, and swinging one at a time. Watch where balls finish, where your feet naturally travel, and whether any target line feels too close to another zone.
Then move through a normal practice sequence: warm up with a few putts, hit chips, make a few full swings, and retrieve the balls. Adjust anything that feels awkward. The best layout is not necessarily the one that looks best from the patio. It is the one that lets you practice without constantly moving equipment or worrying about where the next ball might go.
Helpful Tips
- Keep the swing mat and net in a fixed location if possible. Repeatedly moving them invites small alignment changes and skipped safety checks.
- Use movable putting cups or markers so the same surface can offer straight putts, breaking putts, and short-distance drills.
- Mark chipping landing zones by carry distance rather than relying only on the hole. That makes practice more purposeful.
- Add lighting only after checking where shadows fall. A bright light behind the target can make the ball harder to see.
- Sweep leaves, gravel, acorns, and loose debris off synthetic turf and mats. Debris can affect putts and make a hitting surface feel unstable.
- If kids, pets, or guests use the yard, store clubs and balls when the practice area is not actively supervised.
Common Mistakes to Avoid
- Forcing all three zones into the available space. A useful putting area beats a cramped three-zone setup. If you want full swings, assess their clearance and containment requirements before arranging anything else.
- Letting ball-flight paths overlap. A chipping target and swing bay should not share a crossing line just because they fit neatly on a sketch.
- Assuming any net is suitable for golf. Use golf-rated containment equipment, follow its instructions, and inspect it regularly for damage and loose connections.
- Ignoring drainage. Water problems can undermine a putting surface, create muddy chipping lies, and make a good-looking setup frustrating to use.
- Putting storage in the hitting area. Bags, baskets, chairs, and loose clubs create clutter and tempt people to enter the wrong space.
- Using real balls in a space that cannot safely contain them. Switch to suitable practice balls or limit the area to putting and controlled short-game work.
Final Thoughts
A good home golf area does not need to copy a country club practice facility. It needs clear zones, predictable ball paths, and a full-swing station that is genuinely safe before anything else gets added.
Build around how you will actually practice. If the setup is easy to enter, safe to use, and quick to reset, you will spend more time hitting useful shots and less time untangling nets, hunting balls, or explaining a fresh dent in the siding.
Frequently Asked Questions
Can putting and chipping use the same green?
Yes. A putting surface can also serve as a chipping target as long as the chip line stays separate from the full-swing area and walking paths. Use designated landing spots to keep the drills focused and avoid scattering balls across the entire green.
How much room do I need for a home golf swing zone?
It depends on the golfer, longest club, overhead clearance, surrounding obstacles, and containment system. Test the space with slow driver swings before committing to a layout. Manufacturer guidance for your specific net, screen, launch monitor, or simulator can also provide useful planning baselines.
Is natural grass or synthetic turf better for a home putting area?
Synthetic turf generally offers more predictable upkeep and can work well in compact spaces. Natural grass can provide a more traditional experience, but it often requires serious attention to drainage, irrigation, mowing, and turf health.
Can I use a regular sports net for golf practice?
Do not assume a general sports net can safely contain golf shots. Choose equipment specifically intended for golf, follow the manufacturer’s installation instructions, and inspect it before use for worn netting, loose connections, and wind-related instability.